Hosted Fields - IFrames
Securely collect credit card information directly on your website
What Does the Iframe Do?
The iframe provided by PayArc allows merchants to securely collect credit card information directly on their website while maintaining the site’s look and feel. It ensures that sensitive card data is handled by PayArc’s secure infrastructure, reducing the merchant's PCI compliance responsibilities.
By seamlessly integrating with the merchant’s payment flow, the iframe generates a token that can be used for transaction processing without storing sensitive information on the merchant's servers. This improves security, simplifies compliance, and provides a seamless experience for customers.
Business Description
PayArc provides a token that can be used later to justify a financial movement. The token is obtained by providing credit card information. To blend into the merchant’s site and maintain the look and feel of the merchant’s portal, PayArc provides access to iframes that must be embedded in the site.
Technical Integration
Overview
In order for PayArc to get credit card data input from a merchant’s site, several steps must be completed:
- Set constants for the merchant’s PayArc API key, names of the containers, and target endpoint.
- Define the callback for PayArc’s interaction.
- Manage the look and feel by updating styles provided by PayArc.
- Place input components in the body of the page.
PayArc uses iframes to provide HTML containers for customers to input credit card data. It expects to get information from containers with predefined names.
Constants
The following JavaScript constants must be set:
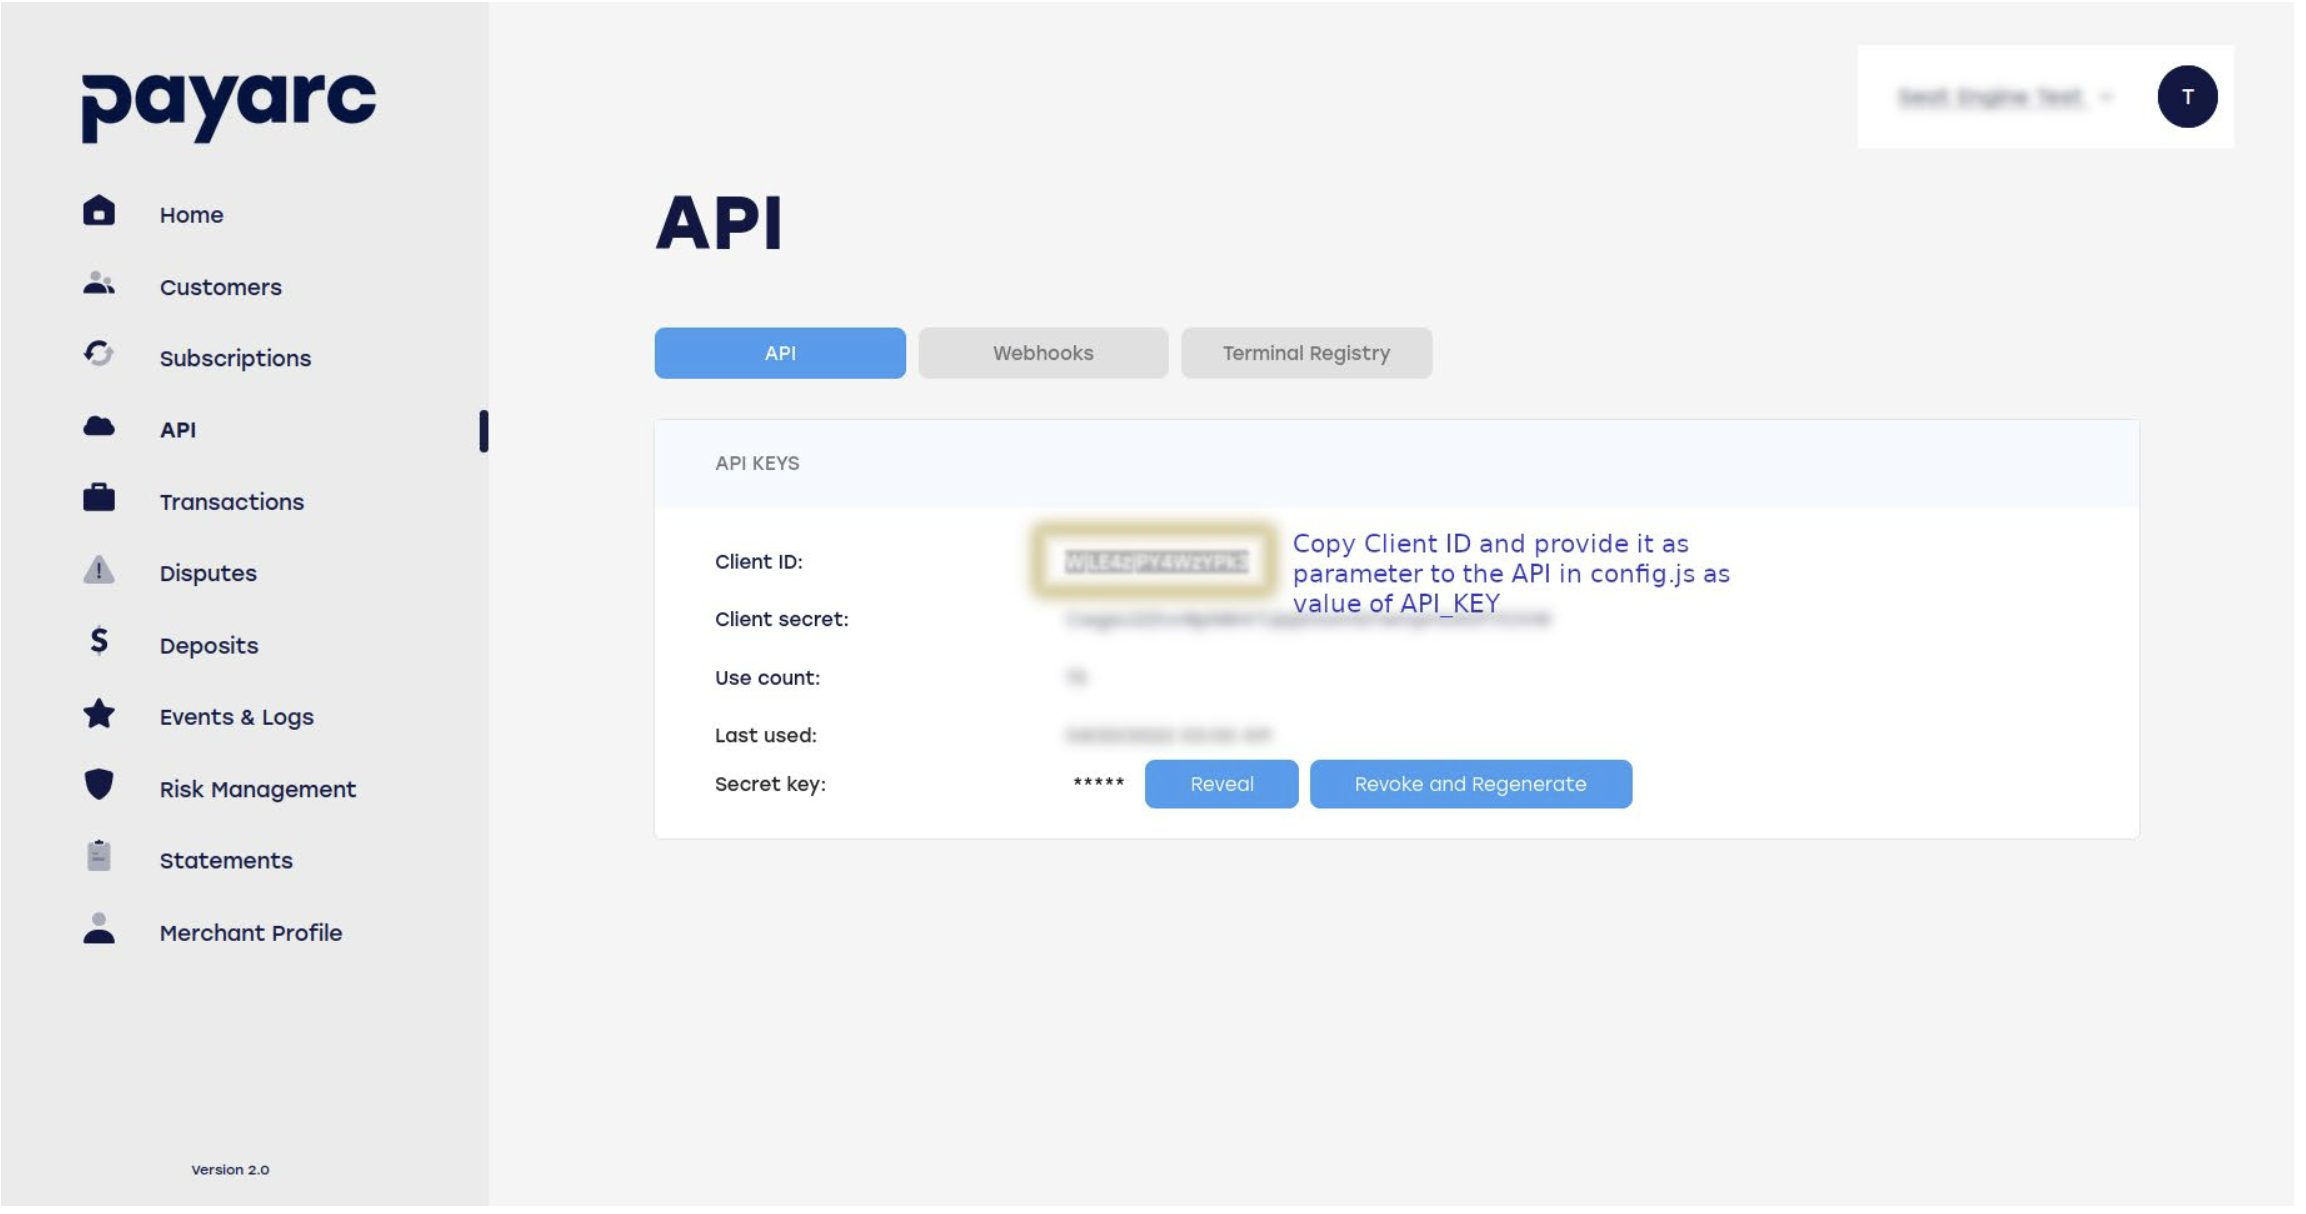
- PAYARC_API_KEY: The merchant’s specific ID obtained from the Merchant's dashboard API section.

-
PAYARC_INITIAL_VALUES: Allows you to override predefined container names.
-
FORM_STATUS: Identifier of the container.
-
INITIATE_PAYMENT: Name of the HTML object (button) ID that triggers token generation.
-
FIELDS_CONTAINER: Name of the card iframe elements container.
-
TOKEN_CALLBACK: Name of the function for the JavaScript callback.
-
walletPayment: Object (only required if you want to enable your customers to use wallet payments)
// Code Example const walletPayment = { amount: 5000, // Transaction amount in cents ($50.00) onTokenReceived: function(token) { console.log("Card Token:", token); // Perform further actions with the token here }, onWindowOpened: function() { console.log("Payment window opened."); // You can prompt the user to continue in the opened payment window }, onWindowClosed: function() { console.log("Payment window closed."); // Handle cleanup or retry logic here }, windowWidth: 400, windowHeight: 300, html: "<div id='google-pay-placeholder'></div><div id='apple-pay-placeholder'></div>", css: "div { text-align: center; }" };- amount*: integer *value in cents
- The amount parameter specifies the transaction amount to be processed for wallet payments (e.g., Apple Pay or Google Pay). It is a required field within the walletPayment object.
- onTokenReceived: function(token)
- The onTokenReceived callback is an optional parameter used specifically when enabling wallet payments (e.g., Apple Pay or Google Pay). When passed as part of the walletPayment object, this callback function will handle tokens generated from wallet payments instead of using the default TOKEN_CALLBACK function.
- onWindowOpened: function()
- The onWindowOpened callback is an optional parameter that signals when a payment window has been successfully opened. This allows you to perform additional actions on your website, such as displaying a loading animation or prompting the user to continue the checkout process.
- onWindowClosed: function()
- The onWindowClosed callback will only trigger when the window closes without generating a token. If a token is successfully generated, the onTokenReceived function will handle that action. This callback allows you to handle scenarios where the user exits the payment flow, enabling you to perform cleanup actions, reset the UI, or prompt the user to retry the process.
- windowWidth: integer(400)
- The windowWidth is an optional parameter with a default value of 400(px).
- windowHeight: integer(300)
- The windowHeight is an optional parameter with a default value of 300(px).
- html: string
- The html string is an optional parameter containing custom html code that will be rendered within the payment window.
- Placeholders within the code:
- These placeholders will indicate where the buttons for the wallet payments will get injected into the DOM tree. You can style the width, height and position of those placeholders, the buttons will fill them in order to achieve the desired UI result.
- Google Pay
<div id='google-pay-placeholder'></div>
- Apple Pay
<div id='apple-pay-placeholder'></div>
- This code will get sanitized on our side to prevent any malicious actions.
- Allowed html tags:
- div, span, section, article, header, footer, aside, main, nav, p, h1, h2, h3, h4, h5, h6, strong, em, b, i, ul, ol, li, small, abbr, img, label, button, hr, br
- Allowed html attributes:
- id, class, style, title, src, alt, width, height, type, aria-* (all accessibility attributes)
- Allowed html tags:
- Due to Content Security Policy restrictions, you can not link external sources. If you would like to include images, you can do that by providing a base64 string in the src attribute.
- css: string
- The css string is an optional parameter containing custom css code that will be used to style the provided html.
- This code will get sanitized on our side to prevent any malicious actions. We recommend keeping it as simple as possible to avoid issues. If your css is not getting applied, check the javascript console of the payment window to see why your css is rejected and correct it.
- Forbidden language constructs:
- @import
- @namespace
- @charset
- javascript:
- behavior:
- moz-binding:
- vbscript:
- content:
- expression()
- url()
- eval()
- data:text
- Forbidden language constructs:
- amount*: integer *value in cents
-
Callback
To get the token, trigger an action (e.g., click a button). The response is handled in the JavaScript TOKEN_CALLBACK function. You must manage positive cases when the token is generated successfully, as well as handle errors from the server.
In case of success, the response will be in JSON format and can be parsed to extract information such as the token and the first six and last four digits of the credit card number.
Manage Look and Feel
To blend the input components into your site's design, PayArc provides a list of styles. Use the following containers and customize them as needed:
- payarc-all: Container of all elements.
- payarc-input: Data input field.
- payarc-label: Common style for all component labels.
- payarc-input:hover: Style for when the mouse passes over components.
- payarc-container: Container for each component.
- payarc-label-container: Container for each label.
- payarc-input-container: Container for each input field.
- payarc-row:after: Clears floats after rows.
Error Codes
- 200: Success
- 403: Wrong Client ID (Forbidden).
- 422: Data validation error (Empty fields, wrong CVV, wrong expiry date).
- 408: User session expired.
- 419: User session expired.
- 409: Wrong response from Payment Gateway (e.g., wrong card number).
Questions and Answers
Q: Can I hide the labels of input fields?
A: Yes, use display: none; in the .payarc-label style.
Q: What is payarcInitiatePaymentObject?
A: It's an internal object to accept the values entered by the customer.
Q: Do I need to define a container to group those card fields?
A: Yes. The default name is payarc-card-token-container, but it can be overridden in PAYARC_INITIAL_VALUES.
Demo
The code below can be put on your server with minimal customizations to test token generation:
<!DOCTYPE html>
<html lang="en">
<head>
<meta charset="UTF-8">
<meta name="viewport" content="width=device-width, initial-scale=1.0">
<title>Payments Demo</title>
<style>
* {
box-sizing: border-box;
margin: 0;
padding: 0;
}
html, body {
font-family: 'Arial', sans-serif;
}
body {
background: #121744;
}
.header {
width: 100%;
display: flex;
justify-content: space-between;
align-items: center;
}
.logo-container {
display: flex;
align-items: center;
}
.logo-img {
width: 150px;
height: auto;
margin: 15px;
}
.logo-wrapper {
width: 100%;
display: flex;
justify-content: center;
padding: 1em;
}
.text-center {
text-align: center;
}
.checkout {
display: flex;
width: 100%;
justify-content: space-around;
}
/* Left Panel */
.input-panel {
width: 100%;
max-width: 250px;
padding: 15px;
background: #121744;
color: #ecf0f1;
}
::placeholder {
color: #bdc3c7;
}
.input-group label {
display: block;
font-size: 14px;
color: #bdc3c7;
margin-bottom: 5px;
}
.input-group input {
width: 100%;
padding: 7px;
font-size: 14px;
border: 1px solid #34495e;
border-radius: 4px;
background: #34495e;
color: #ecf0f1;
}
.input-group input:focus {
border-color: #419DF1;
outline: none;
}
.input-panel button {
width: 100%;
padding: 10px;
background: #419DF1;
color: #fff;
border: none;
border-radius: 4px;
font-size: 16px;
cursor: pointer;
transition: background 0.3s ease;
}
.input-panel button:hover {
background: #2f71b0;
}
/* Right Panel */
.result-panel {
width: 60%;
display: flex;
align-items: center;
justify-content: center;
max-width: 600px;
}
.result-panel .placeholder {
font-size: 16px;
color: #95a5a6;
}
.result-panel .result-content {
display: none;
font-size: 16px;
color: #121744;
width: 100%;
}
#card-token-container {
display: flex;
flex-wrap: wrap;
}
#credit-card-number {
width: 100%;
height: 65px;
}
.half-width {
width: 50%;
}
.half-width div {
width: 100%;
height: 65px;
}
#credit-card-zip {
width: 100%;
height: 65px;
}
.btn {
width: 100%;
padding: 10px;
background: #419DF1;
color: #fff;
border: none;
border-radius: 4px;
font-size: 16px;
cursor: pointer;
transition: background 0.3s ease;
margin-top: 10px;
}
.btn:hover {
background: #2f71b0;
}
.row {
display: flex;
height: auto;
min-height: calc(100vh - 66px - 15px);
margin-top: 15px;
}
.checkout-container * {
box-sizing: border-box;
}
.checkout-card {
background: #ecf0f1;
border-radius: 8px;
box-shadow: 0 4px 8px rgba(0, 0, 0, 0.1);
padding: 20px;
margin: 0 auto;
font-family: Arial, sans-serif;
}
.checkout-header {
text-align: center;
margin-bottom: 20px;
}
.checkout-item {
display: flex;
justify-content: space-between;
margin-bottom: 20px;
border-bottom: 1px solid #bdc3c7;
padding-bottom: 10px;
}
.checkout-payment-methods {
display: flex;
flex-direction: column;
gap: 10px;
}
.checkout-btn {
width: 100%;
padding: 10px;
background: #419DF1;
color: #fff;
border: none;
border-radius: 4px;
font-size: 16px;
cursor: pointer;
transition: background 0.3s ease;
}
.checkout-btn:hover {
background: #2f71b0;
}
.checkout-btn-card {
background: #34495e;
}
.checkout-btn-card:hover {
background: #121744;
}
#paypal-button-container {
width: 100%;
display: flex;
justify-content: center;
}
</style>
<style id="payarc-styles">
/*if you want to override look and fill of payarc iframes update styles below*/
/*using the exact same style name*/
/*example styles:*/
.payarc-all {
box-sizing: border-box;
}
.payarc-input {
width: 100%;
padding: 12px;
border-radius: 4px;
resize: vertical;
}
.payarc-label {
display: none;
}
.payarc-input:hover {
background-color: lightblue;
}
.payarc-container {
border-radius: 5px;
/*background-color: #f2f2f2;*/
background-color: transparent;
/*padding: 20px;*/
}
.payarc-label-container {
float: left;
width: 25%;
}
.payarc-input-container {
float: left;
width: 55%;
margin-top: 6px;
}
.payarc-row:after {
content: "";
display: table;
clear: both;
}
.payarc-input-default {
color: black;
font-size: 14px;
border-style: solid;
border-width: 1px;
border-color: gray;
}
.payarc-input-success {
color: #5cb85c;
font-size: 14px;
border-style: solid;
border-width: 1px;
border-color: #5cb85c;
}
.payarc-input-error {
color: #d9534f;
font-size: 14px;
border-style: solid;
border-width: 1px;
border-color: #d9534f;
}
</style>
<script src="https://testportal.payarc.net/js/iframeprocess.js" defer></script>
<script src="https://code.jquery.com/jquery-3.7.1.min.js" integrity="sha256-/JqT3SQfawRcv/BIHPThkBvs0OEvtFFmqPF/lYI/Cxo=" crossorigin="anonymous"></script>
</head>
<body>
<div class="header">
<div class="logo-container">
<img class="logo-img" src="https://payarc.com/wp-content/uploads/2024/01/payarc-logo-white-1-300x71.png" alt="PayArc Logo">
</div>
<div class="input-panel">
<div class="input-group">
<input type="text" id="clientId" class="saved" placeholder="Enter Your Client ID">
</div>
</div>
</div>
<div class="row">
<div class="checkout">
<div class="result-panel">
<div class="placeholder">Waiting for Client ID...</div>
<div class="result-content">
<div class="checkout-container">
<div class="checkout-card">
<div class="checkout-header">
<h2>Example Checkout</h2>
</div>
<div class="checkout-item">
<span>Total</span>
<span>$2.00</span>
</div>
<div class="checkout-payment-methods">
<div id="card-token-container">
<div id="credit-card-number" data-payarc="CARD_NUMBER" data-placeholder="Card Number"></div>
<div class="half-width">
<div id="credit-card-exp" data-payarc="EXP" data-placeholder="MM/YY"></div>
</div>
<div class="half-width">
<div id="credit-card-cvv" data-payarc="CVV" data-placeholder="CVV"></div>
</div>
<div id="credit-card-zip" data-payarc="ZIP" data-placeholder="ZIP Code"></div>
</div>
<button class="btn" id="initiate-payment">Buy</button>
<div class="text-center">Prefer a wallet payment? Select one below.</div>
<button class="checkout-btn apple-pay-button" style="background: #000; color: #fff; display: none;" data-payarc-wallet="apple-pay">Apple Pay</button>
<button class="checkout-btn" style="background: #4285F4; color: #fff;" data-payarc-wallet="google-pay">Google Pay</button>
<div id="paypal-button-container"></div>
</div>
</div>
</div>
</div>
</div>
</div>
</div>
<script>
const storage = JSON.parse(localStorage.getItem('iframe-demo') || '{}');
storage['html'] = `
<div class="bg-color">
<div class="logo-container">
<img
class="logo-img"
src="data:image/png;base64,iVBORw0KGgoAAAANSUhEUgAAASwAAABHCAMAAACK54pqAAAASFBMVEVHcEz///////////////////////////////////////////////////////////////////////////////////////////8FevL4AAAAF3RSTlMA2QII8voYEcXnKLs1rZ7Rih5Ed1Jfaybo/FAAAAn1SURBVHja7VvXtqwoEFUQEQlm/f8/HVO3UlWo9Jl715w1zQ0PNhI2u4pKJtNVy1ThRiOT68ak6VyhxN6dbw/zuTXHP7b0856sz9BY4DWvjyxHp1U2CVXZ7rUsMChH4/DT6E1f6zQTQg2MmLqdh0/nfUwqnTfS5gx2mu5altqe2tYxx2DnDRzdXbssL3fFubk8SfjoPSpsiUfLrd+n5seR9C6d5xHbPGJe1gpX5/XX+5jyPb2uW/mCaizUvswO7oK3nT5tYyVK18pIsJb3dB9klxx09trAvg1VlyzJK2+Iqpn79pk/bofOgA1+l+zNAN5bBZdlFxY7/1m5vXCeXtXNOkKr34MLAJZsnRJ448r6G58eNeVKklzMuIzoXrWcAktqv1uRI+jthF9bSVErYp50lD5YIjP7QOn5aS1n6gznRx5Y3DgV2rhteSxYkyhaAi3eF4E5hoYAC/GmhwO2/qJFt6kNZrSgOd9JJ3xmJYhZ83LaWQd4Q5/BkmMqwhtPu+NI1UO0prRHaPEh+LbqCLASgODkOBiwBnNufOZtFdQQHc0sQOya98o/hZPOJYXj1PeQqmr6GK0Zq/CJqIwAi3Wgk/FHLMFq6lVjsLa6urBJneWJ4TRpU/lLPcAqrRA3O9dm37kTj9Gq/K2xNp2ev7spH5NCMfNGHP3FzNKzPC2Lq3OfnjCrgtvs3saEfgDA645t1fMd68ajQTFFg8XBogtvRHgBWLlZE8/PM6CzpgxI2lsMnw0u7L78+vlSRH3SMTyCk8e1Bs7GU/GspfQ/H7Pn04SYhVqXRO1+3zkr9fO1KHOITZ99AhYHtoGTZ/gpy8JECHtQZ4XAerwJ1e/XcvF81/ZNrVzH7OEwmHoRVPFQoY2LixTD/OfM2sSQNUWsCmKlU08XlLWvnQ3ZR2AlOVhfd/gznb+KdH3FqCmOWRFiyGJU0LB7itzURapgI29Ux2hT+3WPqwCv32DBG+/4AcAoakZYXttPIjRPnM4qU8IGLay1BWGlvt0NxmRTlqXx/prOYvao/eQM8ZMd2vm92a0WF2AlTQq8v0MJEgLaVISn2rWlMX1N2d2Ub4igntsKVod+0kMpFzTKAVkUynM3GPjLZk8cXaxi3DojAm9e7fzSItbZBbNYDW5lubv9luAwg7737Hf1ewyI8hdvmCVSW4+9aU1vqD6qk2wDYv6xgzPX/CZSlSNQLKMsosVJO11r+LY/mAW10EvFg8fZ6osyaJ8I11yaxVc6K9ND/gZjMWMEdGjPJjIHKhTYhGRcD6K1qd0SnGnmwc4YQusEFrAQXiYMmEhz6jqYnBeo4NCkvmJWOvjUABSfz9v/HVJdtckdWvB2FaupBQyA3dYOm0zesbTi3scW/Xr5wLuwApEiDoUlrLMqA8RIgp1pGDACejkbk1u0oNYYCZUFQWdol1oGvZpNxQMuVltwFky+ml5+ZLV4xiyhUIgJSEcGI82zFq28dg9WAqlVr+43IBaK4jF3cWyDQLSEpshuYUPTCwWioXEW0lmiQ+q5vRs7kTI/N5mYdytpbQ9F2y7s11MgOhQC5MwsuJOZlwwon7Qh53Ych2rVI2YRUAzXmoRqYtr/CGVbMnQMbHWNxT0jXgRy6CuEDl7K0Pas+Taiuz0UoOtCOstxtMSOkJibFr47A6HegqMVKiJNA2xPj1kMqIuqBLb0zg9oe+EwNJTfELMO0zckMWKMBGtKDdEDcKSSj8ACq9WSeRrND5yPwAd6+evwKiAYDPGkddY5XPJqgLVDLFgkFymwUv+mKQlztroQQwZu5aKiGQSRwJYOIF+IWSlhUP4YrAKLNhJDhs8tUgyxwQdWIQNg4ZwJvEYDOqvK8QrrG6vkFizi0qAUfF7cnThS8B5YDPt85za8u8Uq+BCzcIYSJU/qaLAE3jZ/YjqwW9MhB1J6EXY7ycyt6YBcyvIpWJ+YDtMdvpRRikxONBG/6QHDWiiQRccDb41S9Ryse6N0CVudWg7BQq/ALPK0mhfQ3elvDhzchnTgjdCAt+4OPMr0OVjQ3UG2g9QqO/1RHUrfQ2rBfIZYlQJypIGUodQP8lKDIV1xljXsSENiZZ+CxXhxlegjkk0jAgv4k0SIhhEhGuFHxnBACwtqKLju3RZQtQn/VFifTh8ziwjRsKsspjIILKHOYZ+mzqj8DkPBP3Uqn4BFGCRYDEVxXpFdfnG7TNkp+McwVu/L4QlYgDmTt3OcVioaoopG1a/iPYnDylM4rNxyFi7g0Xi1tPUAHBOURBK639UfLzsc7Y9hFhFWflftMUyTWXjISLUbW2Pazqqg9iWy/qld3xodlUjAYohD09S2qISF7fp5nqGuiHliwII36RJ4Hsucc5mbDpk2S8wukKtUgWST27Nn5E7FkkGjrU10GwZSj9DuJHOsF/NEgEXeyFmqnbOaSFAtshGVwvw8yUqIIcUabLpEJlkjdNaSaKKTj7R6YLFgHWZuZPqeEMMEi8HZIA2p+BuwYphFHtdV+j5qKadYO+vVT8Eiaj6UwaHQ9M+BlQxPN7EVhsSsxLOmZFTJESWGRNWSxVEPlMD5N8GKLDmKosfnxWwks9CdqohQaFwxW4zO2iI8z4rZ8iQSrNQPNxIm4RVY7MF1RENqij/GrFltPSmTLPYoGdD5F5RPew597AuJByORYghDD4E05mUBrsh+BtZSgHvHq3cBLoAwLMMIq6VcOcitrK7uOQM9vypQTXCBVub0D8FKmpvS7syVdDxLy5p+M/TRQEWDq8bmAVj3n6e8r8TQRwN1Y3+ks24/GlhKawLBP704wYJEN+ZzlHTgTXUrhjAQT+aW3h69ojcCYvAfMOvyc5StkooES+iF86iGLdM9D3/oVKDuzhCpsNu7ULiLAqilVgwva/bd+b8A1vKhE1WCJ5T1Nz6hbEQi+/ObQrk+P4qaCM0z+N3t6RM6Xez/1xgsWHt1XdLD1k/ozvPoQa6WkjfPK961f0L3eu5uA+zc1L5HKFTRwcIbAqz5GM3odJWmaaHrvuSXeQ82dy+HWldz/0q7YS+ZYLPzzqWU2/8Sj8Gg3WD5bUVP2de2WOY5fQRKz8O4PD+/HXohgzTDNvw8vq17Ixn8OpMCa4M6b5pm6X+fIlpqI5lcunPv4XUDqaisfzDTEmSb58nP2LPQ5j9oM8bLtnNJbxvprA9b9OJg6K3IWfJfb0Fm/ekGEouPMsL/V7Bg9LAqky9YoQayBaJmvw0s8dfAgrkdZZIvs0INRosd/4IVvDtBvU/WJl+wgq5eepn+/+qsq0DWwL7MCtoNBcyMf8EKNlCEQ1T0f8EKBrLK5BeC9Xd0FqxVvv2S7//MLFhkqdrkC1aowUCWk1+wgsRCgazkV4L1V3QWDGTpPPkyK9QGmFllX7BCQsh/YyBrb9Zr3V9wC50/5S8i1j8iIVakUYw8iwAAAABJRU5ErkJggg=="
alt="PayArc Logo"
>
</div>
<div class="ant-checkout-container">
<div class="center-align">
<div class="ant-checkout-card">
<div class="ant-checkout-header">
<h2>Checkout</h2>
</div>
<div class="ant-checkout-item">
<span>Total</span>
<span>$2.00</span>
</div>
<div class="ant-checkout-payment-methods">
<div id='apple-pay-placeholder'></div>
<div id='google-pay-placeholder'></div>
</div>
</div>
</div>
</div>
</div>
`;
storage['css'] = `
.ant-checkout-container * {
box-sizing: border-box;
}
.ant-checkout-card {
width: 50%;
background: #ecf0f1;
border-radius: 8px;
box-shadow: 0 4px 8px rgba(0, 0, 0, 0.1);
padding: 20px;
margin: 0 auto;
font-family: Arial, sans-serif;
}
.ant-checkout-header {
text-align: center;
margin-bottom: 20px;
}
.ant-checkout-item {
display: flex;
justify-content: space-between;
margin-bottom: 20px;
border-bottom: 1px solid #bdc3c7;
padding-bottom: 10px;
}
.ant-checkout-payment-methods {
display: flex;
flex-direction: column;
gap: 10px;
}
.ant-checkout-btn {
width: 100%;
padding: 10px;
background: #419DF1;
color: #fff;
border: none;
border-radius: 4px;
font-size: 16px;
cursor: pointer;
transition: background 0.3s ease;
}
.ant-checkout-btn:hover {
background: #2f71b0;
}
.ant-checkout-btn-card {
background: #34495e;
}
.ant-checkout-btn-card:hover {
background: #2c3e50;
}
.center-align {
display: flex;
justify-content: center;
align-items: center;
min-height: calc(100vh - 90px);
}
.logo-container {
display: flex;
justify-content: center;
align-items: center;
height: 70px;
padding: 10px;
}
.logo-img {
width: 150px;
height: auto;
}
.bg-color {
background: #121744;
}
#apple-pay-placeholder {
width: 100% !important;
}
`;
if (window.ApplePaySession) {
$('.apple-pay-button').show();
}
let PAYARC_SETTINGS = {
FORM_STATUS: 'form-status',
INITIATE_PAYMENT: 'initiate-payment',
FIELDS_CONTAINER: 'card-token-container',
TOKEN_CALLBACK: {
success: (obj) => {
const response = JSON.parse(obj.response);
document.getElementById('card-token').textContent = response.token;
console.log('Tokenization successful!', response.token);
},
error: (obj) => {
alert(`ERROR: ${obj.status} - ${obj.statusText}`);
if (![422, 409].includes(obj.status)) {
alert('Payment gateway error. Please try again.');
}
},
paymentWindowClosed: () => {
console.log('Payment window closed, needs to be handled.')
}
},
walletPayment: {
amount: 200,
html: storage['html'],
css: storage['css'],
onWindowOpened: () => {
$('.placeholder').html('Waiting for payment...').show();
$('.result-content').hide();
},
onWindowClosed: () => {
console.log('Payment window closed');
$('.placeholder').hide();
$('.result-content').show();
},
onTokenReceived: (token) => {
$('.placeholder').html('Payment token: ' + token).show();
$('.result-content').hide();
},
windowWidth: 600,
windowHeight: 450
}
};
$('.saved').on('change', function() {
storage[this.id] = this.value;
localStorage.setItem('iframe-demo', JSON.stringify(storage));
});
//load storage on page load
$(document).ready(function() {
for (let key in storage) {
$('#' + key).val(storage[key]);
if (key === 'clientId' && storage[key]) {
$('#clientId').trigger('change');
}
}
});
//wait for input (not keyup)
$('#clientId').on('change', function() {
storage['clientId'] = this.value;
localStorage.setItem('iframe-demo', JSON.stringify(storage));
if (!this.value) {
return;
}
const placeholder = $('.placeholder');
const resultContent = $('.result-content');
placeholder.hide();
resultContent.show();
initPayarcTokenizer(this.value, PAYARC_SETTINGS);
});
$('#initiate-payment').click(function() {
getPayarcToken(this);
});
</script>
</body>
</html>
Step by Step Demo Setup
This guide uses Visual Studio Code and the Live Server extension for running the demo. If you're using a different editor or method, the steps may vary slightly.
- Set Up the Demo Page
- Copy the demo code block provided.
- Paste it into a new .html file using your code editor.
- Right-click the file and select “Open with Live Server” (or use a similar feature in your editor).

- Load the Demo in Your Browser
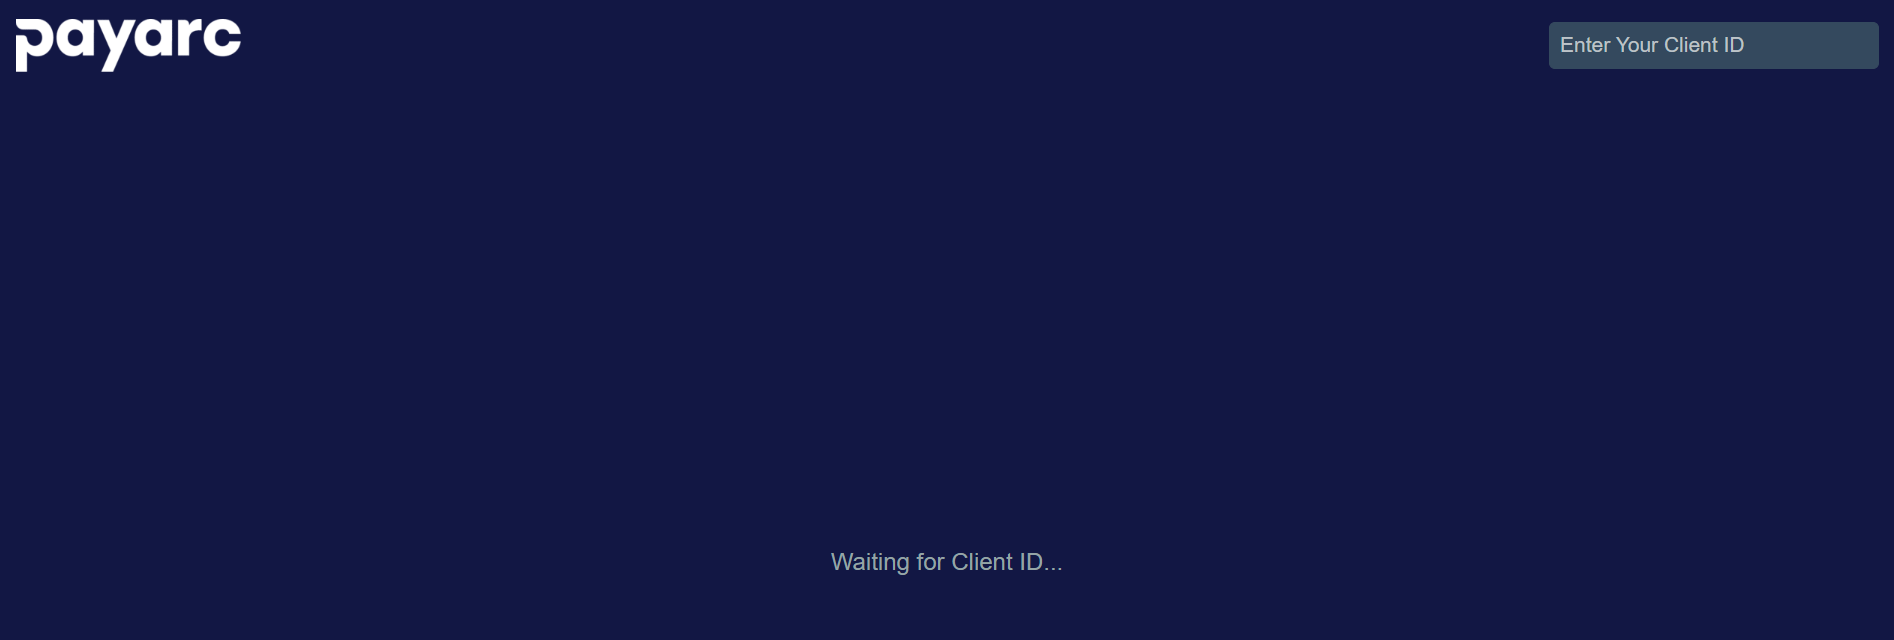
- Your browser should open and display the demo interface.
- You’ll now need to enter your Client ID from the Sandbox/Test environment.
- 📘 Need help? Refer to our Authentication Guide for instructions on retrieving your Client ID.

- Enter Test Card Details
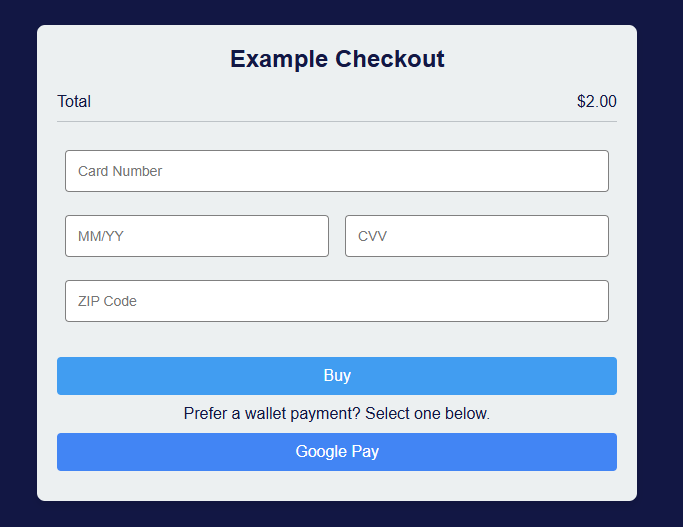
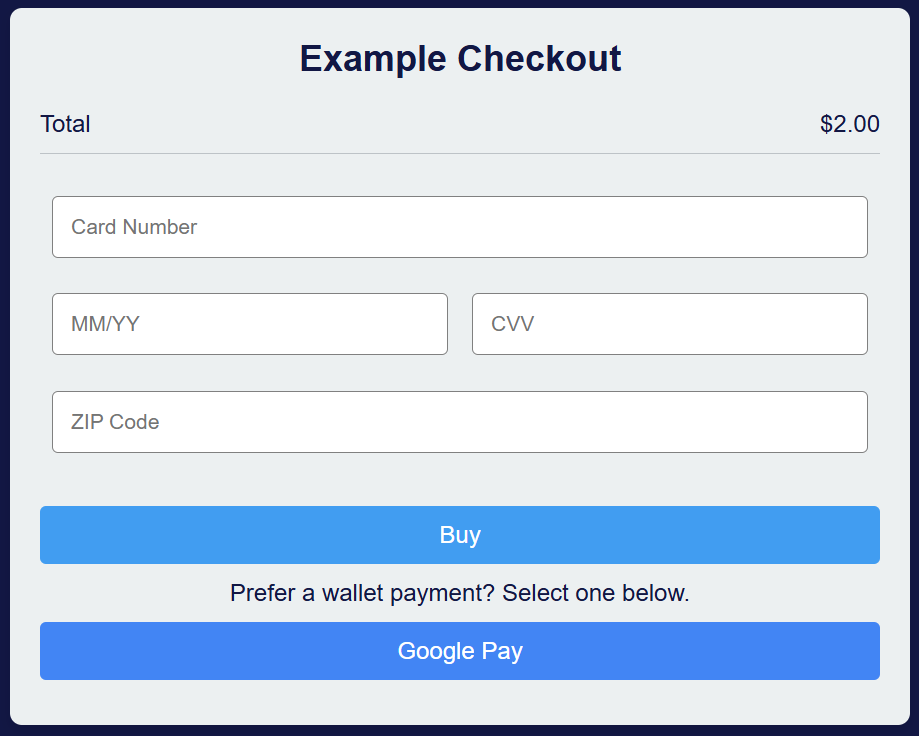
- After entering a valid Client ID, the payment form will appear.
- Use one of our Test Cards to fill in the card details.
- 💳 Find test cards here: Test Cards

-
Inspect the Network to Retrieve the Token
- Before clicking the Buy button:
- Right-click on the page and select “Inspect”.
- Navigate to the Network tab in the developer tools. Then:
- Click Buy after entering the test card details.
- Look for a get-token? request in the Network tab.
- Click the request to view the Response, which contains your payment token.
-
Use the Generated Token
You can now use the token to:
- 💵 Create a test charge by calling the Charges API , or
- 👤 Attach it to a Customer record for later use.
Important: Tokens are single-use. If you store it with a customer, you must use the Customer ID for any future charges instead of reusing the token.
Updated 5 months ago